Upgrade your explainer videos with stock footage
Kelvin Ke Jinde offers a step-by-step guide to creating instructional videos to support your teaching with the help of stock footage

Created in partnership with

Created in partnership with
You may also like

Popular resources
Explainer videos are a great way to give students a background on a topic so they understand crucial concepts before coming to class.
However, watching video after video of PowerPoint presentations can quickly become tiring.
While illustrated and animated videos are popular, other options include whiteboard, live-action and talking-heads-style videos.
However, I find stock footage, ie generic stock videos that you can download from free or paid sites, to be one of the most cost-effective and fuss-free ways to make explainer videos more exciting.
So, if you think stock footage may be the thing for you, here is my recipe for spicing up videos:
Ingredients to prepare
1. Script
2. Voice-over recording
3. Stock footage
4. Still images
5. Stock music
Step 1: write your script
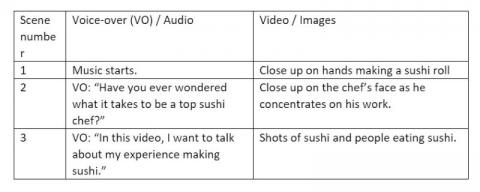
Scriptwriting plays a vital role in helping you map out your topic’s talking points and learning journey. It also acts as a technical blueprint to help you to find the corresponding stock footage for your video. Below is a two-column script sample you can adapt for your own needs. Note: one page of script is more or less one minute of screen time.
Sample
Step 2: search for footage
Some popular paid sites for stock footage are Getty Images, Shutterstock, Alamy and Vimeo. For free sites, try Pexels and Creative Commons.
I’ve found that paid-for services are usually worth it, so see if your university already has a licence with one of the leading providers. Remember to always check if there are copyright restrictions or royalty-fee requirements.
Keyword search is vital for getting the best footage. Spend a bit of time thinking about the categories and themes of your desired footage, and note down alternative terms for what you’re looking for.
Continuing with my sushi example, you can start with a broad search for something such as “sushi”. Then, narrow and refine it with terms like “sushi chef”, “sushi dinner” or “Japanese dinner party” depending on what you still need.
Stock footage is designed to be as generic as possible, so finding exact matches can be difficult. Consider using stock photos or stock animations to plug any gaps in your video.
For those looking to do specific demo videos, such as using a specific software or hardware, this method may not be suitable. You may need to film your own videos or take photos for particular items or case studies. But there is a silver lining to that – you may consider selling your footage to stock footage sites, which may even allow you to recoup some of your costs.
Step 3: manage and store footage
Once you’ve downloaded your footage, label and store the files clearly on your computer. You can use them repeatedly, so keep them safe for future projects. Remember to give them descriptive names or put them in folders that allow for easy searching later on.
Step 4: edit video
While Premiere Pro CC, DaVinci Resolve and Final Cut Pro are highly recommended, Windows Movie Maker or iMovie should be more than enough for beginners.
Always remember to use your script to guide you during editing and keep each shot to less than five seconds if possible – longer durations tend to be boring for viewers.
Step 5: sound and music
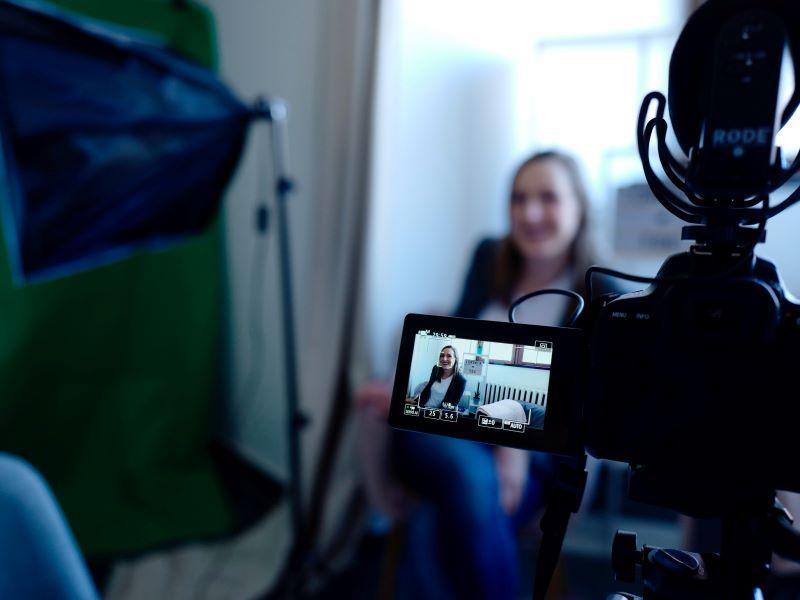
Once you’ve laid out your video, it’s time to record your voice-over. You can record straight onto your computer or phone, but I recommend getting a lavalier or clip-on microphone for better quality. Also, remember to turn off all fans and air-conditioners when recording.
Music is important. Generally, I would advise you not to pick anything with pounding rhythms or beats, as it will most likely distract the viewer from your narration. Make sure that your voice can still be heard clearly above the music.
Points to consider
-
For advanced tutorials, do check out Videomaker Channel or YouTube Creators Channel.
-
The recommended resolution for downloading stock footage is 1920 x 1080.
-
I suggest exporting your final video as either H.264 or as MPEG-2 for YouTube.
-
Always check with your IT department on video resolution, codec and file sizes that match your respective learning management systems.
Kelvin Ke Jinde is assistant professor of communication studies at Xi’an Jiaotong-Liverpool University.